| Postalbanks.com | |
| Home Products- • Pedestal banks • Oval Banks • Elipse banks • MD Banks • Corian Banks • Tombstone banks • Round coopered banks • Corian Slots • Extras Contact us |
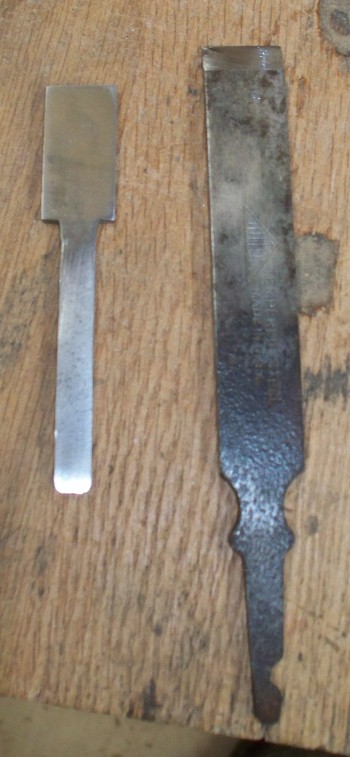
Building Two Shoulder Planes Here's part of the inspiration for these two planes- I picked up these
two old cheap chisel blades for a quarter each at a garage sale some months ago-
This pic is pretty close to actual size.
There were two other things that inspired me to make these-
one was an article in the Aug/Sept '08 Woodcraft magazine on making a shoulder plane from scrap. The final inspiration was to provide a (late)
Christmas gift for a woodworking Sister-in-law.
Shoulder planes are used for making fine "tuning" cuts to bring tenons and rabetts to a perfect fit.
The wood came from two sources- the white oak for the body is from on old solid wood door that I salvaged a few years ago (much
larger parts of it went into my workbench), and the purpleheart for the sole is cut from a small, irregular piece that my Mother-in-law
gave me some years back. The largest piece of white oak wasn't quite long enough to get to plane bodies out of, so I did a bit of cutting
and glueing at the top to make it up.
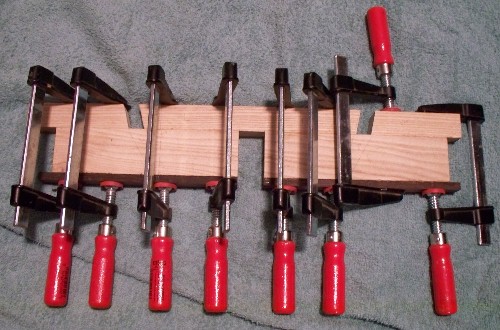
Here, I've made the cut for the first side, and glued it in (the blade is the same width at the body at the sole, with a narrower section
going up through the body, so the sides have to be let into the body. This is much easier than the traditional method of chopping it all out
with chisels). Note the long strips of scrap glued on to the top and bottom of the plane bodies- they allow me to run everything through my
planer. This makes it quick, safe, and easy to get a consistent result. The planing strips are made quite a bit long to allow for planer "snipe"-
this is where the planer blades dig in a bit at the beginning and end of a board, and it's a real pain in a small workpiece. This way, I avoid it
entirely.
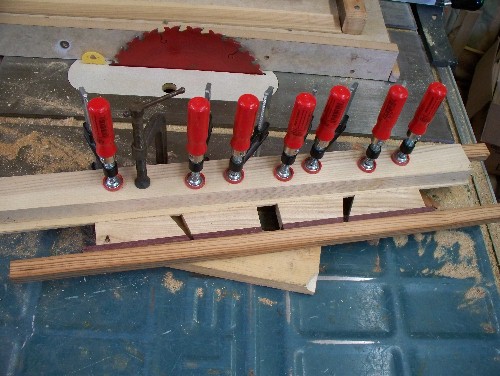
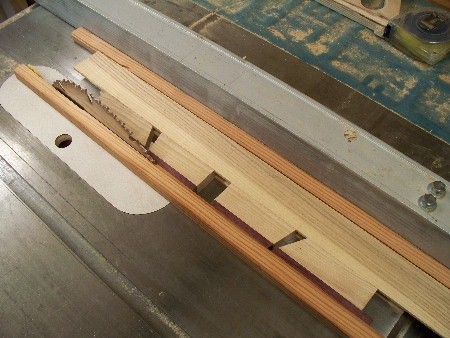
Here's the setup for cutting the rabbet for the sides to go into- a 3/4" straight bit in the router table, with the depth of cut
set to be just a bit less than the thickness of the sides, and the fence moved a couple of times to cut the entire width of the
1 3/4" wide rabbet, being careful not to cut far into the planing strip. I've left the planer setting unchanged from the last cut I took on the
workpiece- I cut one rabbet at a time, glued in the first side, and planed it flush, then cut the second rabbet and repeated the process.
The first side is completed in this pic.
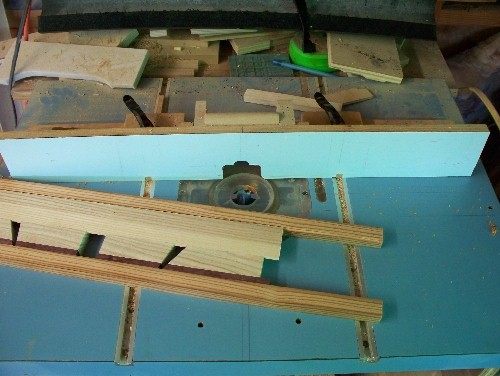
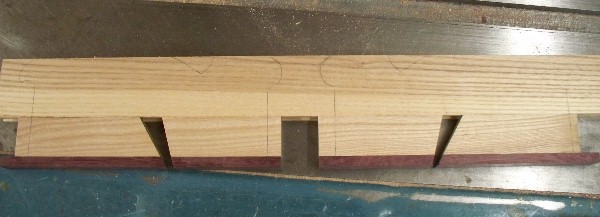
Here the second rabbet is cut, and the second side is ready to glue on. The sides were resawn from the same piece of white oak.
Care has to be taken here to not have a lot of glue squeezeout into the cavity in the plane bodies.
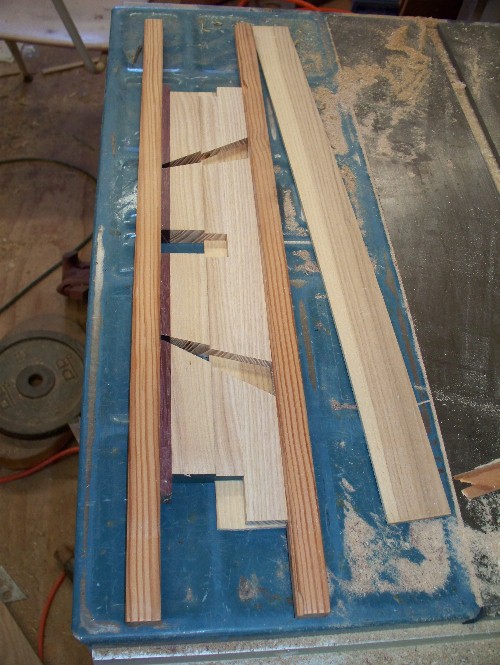
Freeing the two plane bodies from their woody prison!
Here they are, all assembly complete, and ready to be cut to their final shape on the scrollsaw.
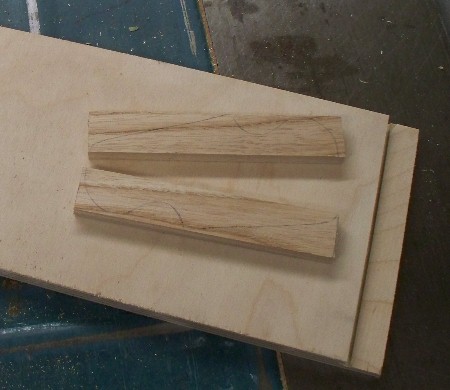
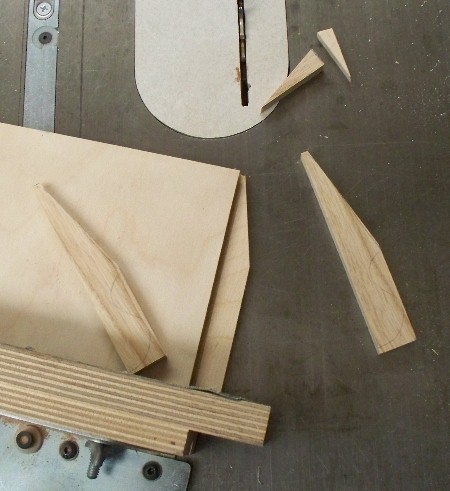
Next I have to make the wedges to hold the blades- here are two pieces of white oak cut to the correct thickness,
and the shape laid out on them. The piece of scrap ply with the rabbet on the end is going to be an aid in cutting
the proper angle to fit into the plane bodies-
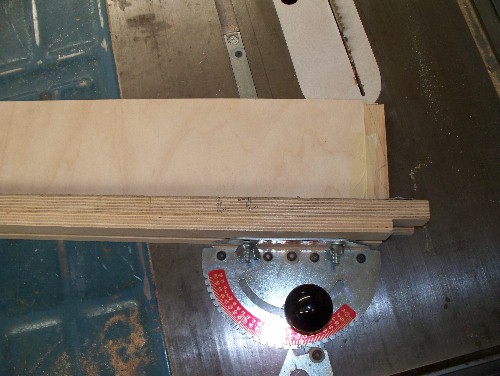
Here's the procedure- one wedge blank at a time is taped to the rabbet in the ply (note the the piece of ply is pretty long- this
aids in getting the angles correct). My miter guage is set to fifteen degrees (btw, I highly recommend these Incra miter guages- this is the
cheapest one they sell, and it would be worth every penny at twice the price- it has simplified my workshop life immensely). The blank is run
though the blade, sneaking up to the layout line. I also used a long softwood push stick to help stabilize the wedge during the cut.
Here's the result- two wedges cut to the correct angle to fit into the plane bodies, and ready to have the end cut on the scroll saw. Not
the bit cut out of the ply- it was a sacrificial piece, anyway :)
Here's the (almost) completed plane bodies and wedges. I had forgotten to cut the chip relief opening at this point. The author of the
Woodcraft article called for drilling a 1" hole for this purpose- I just used my scrollsaw. Note the small knot in the plane on the left-
this didn't show until I planed the wood down.
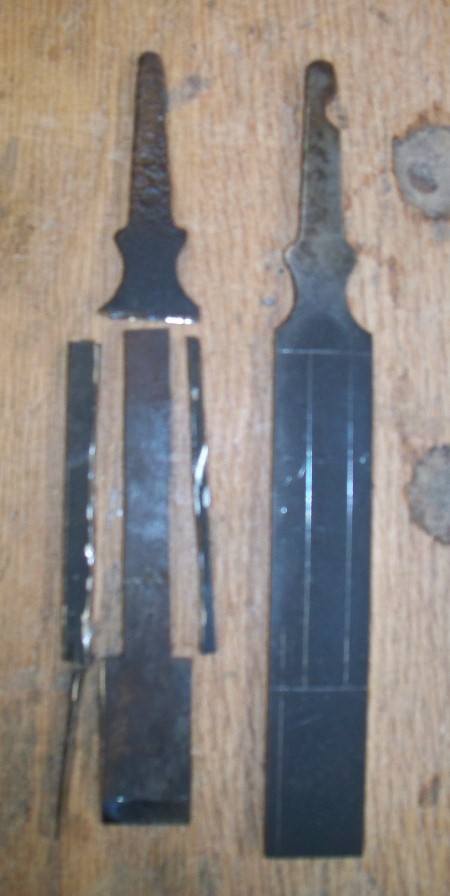
Here's the layout and cuts for making these old chisel blades into shoulder plane irons (blades). These were lower-end chisels, so
I need feel no guilt for modifying them. They do have a good temper on them, though, and I was careful not to ruin that.
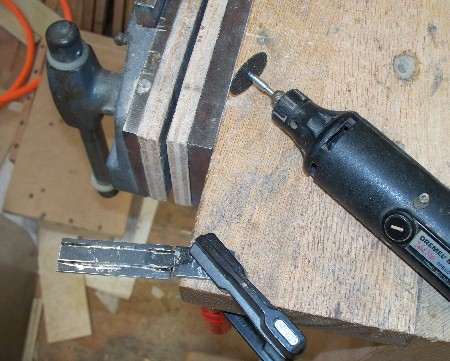
Here's the procedure for cutting them down- clamped to the bench, and chopped up with a cutoff wheel in a dremel tool (I recommend the ones
with the fibre reinforcement- they work much better for this kind of thing). The thin cross section of the wheel made it easy to keep everything
from getting too hot, although I did dip the blades in cold water every few minutes anyhow. The whole thing just took time and patience- it was like
a zen experience, with lots of noise and sparks :) Yes, I was careful to use eye and ear protection.
Here's a finished plane iron, next to the remaining original- note that perfection is only required at the cutting edge :)
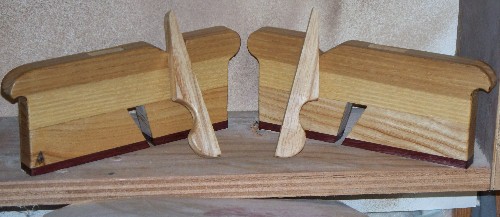
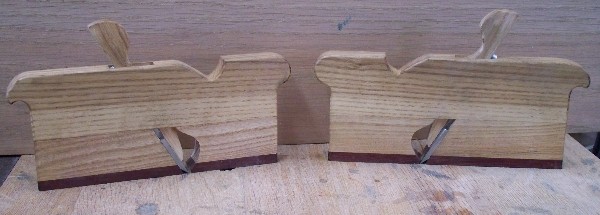
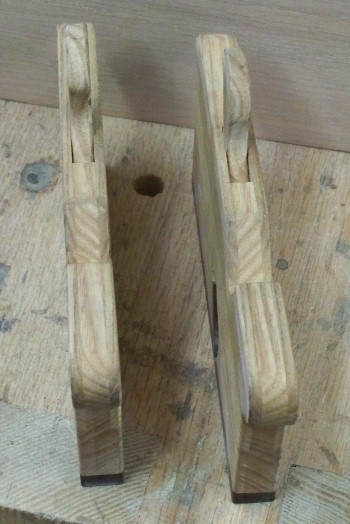
Two views of the completed shoulder planes- note that they are 5/8" in width, and about six inches long.
All in all, a very satisfying and enjoyable project! I'm sure I'll get plenty of use out of mine in the years to come, and I certainly
hope that my sister-in-law does the same!
|